Garden Update: July 2015. Small Town Girl Blog.

Meanwhile, Back in the Garden… July 2015

It has been a strange summer in Washington…. very strange. When you think of Washington state (particularly Western Washington) , what is the first thing that comes to mind? Apples? Mountains? Probably most of you thought rain right? We’ve had one decent rain in over a month, that’s it. It’s so dry most of the ground is dusty. The ground is never dusty on this side of the Mountains! Temperatures most days  are in the mid 80’s to high 90’s and it just won’t let up. We are in dire need of some serious moisture! I feel like I’m gardening in a completely different zone!

It’s funny, I think I do this every summer: I expect the garden to be in full harvest mode in July and it’s never really there until August. It’s like my harvest clock is confused. I then proceed to feel aggravated as if I have failed when, in fact, I’m almost there. So I’m trying really hard to keep that in mind as the month comes to a close and I anxiously wait for the fruits of my labor to perk up. Come check it out!

Flowers

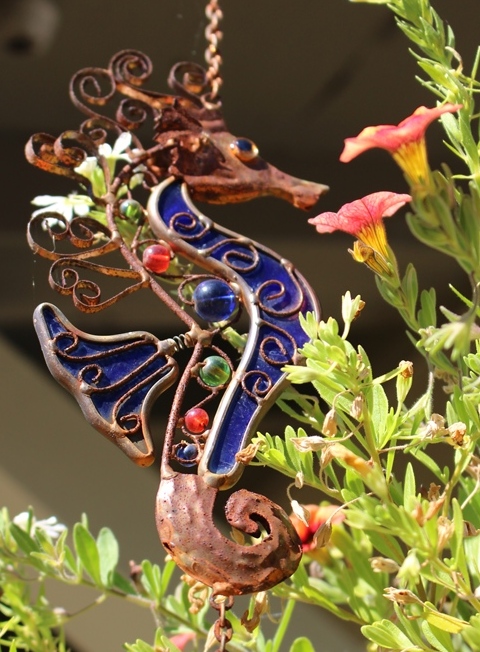
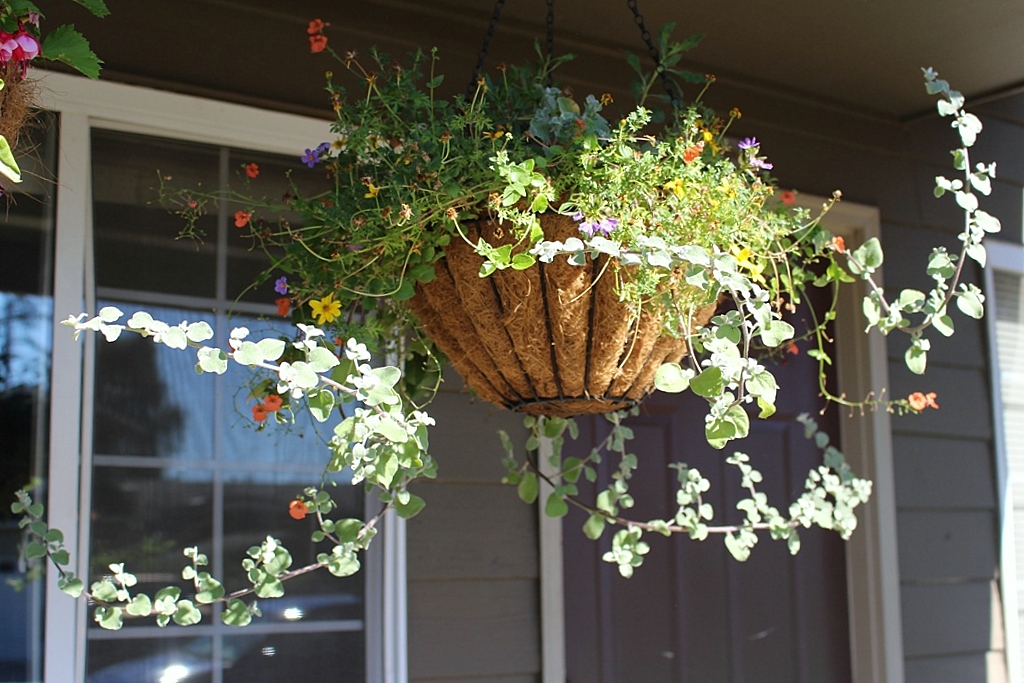
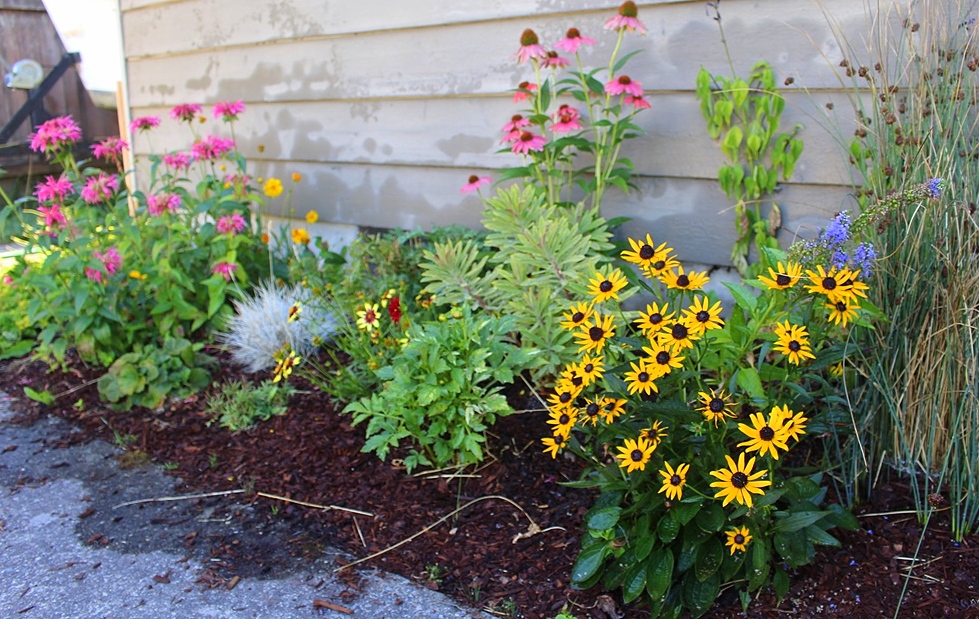
Lets start with the pretties. I’m super proud of those. They are rockin and a rollin!

This is my very silly and probably favorite hanging basket. I think it looks a bit like an octopus with those tendrils which led to MM nick naming it the “Kraken Basket.”

IMG_0151

The perennials are all in various stages of blooming. They’ve had tons of visitors from bumble bees to butterflies and even the hummingbird occasional .

IMG_0162

Some of the new editions that I got at the Northwest Flower and Garden Show are still really tiny. Like the Astrantia Major:

IMG_0170

Yep. this is all that it’s had for months! I don’t know what the deal is. I’m just sticking to the “Don’t F@#$ with it” method since I’m afraid if I give it too much attention it will die. My plan is to pot this little guy and bring it in before the frost this fall. Hopefully it just needs another year to build up.

Any thoughts on why this little guy isn’t getting any bigger?

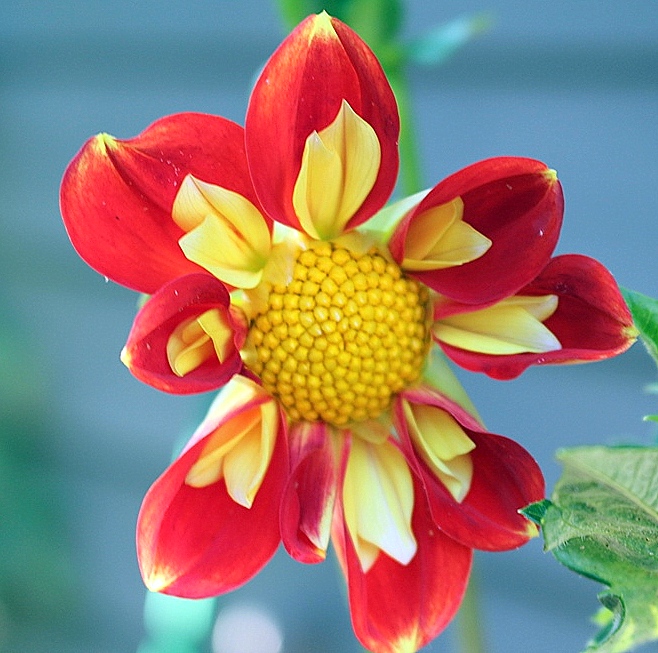
As for the dahlias….

IMG_0185

It seems like every day I go out to the dahlia jungle, and a new one opens up…

IMG_0113

Today’s model is called “Pooh”
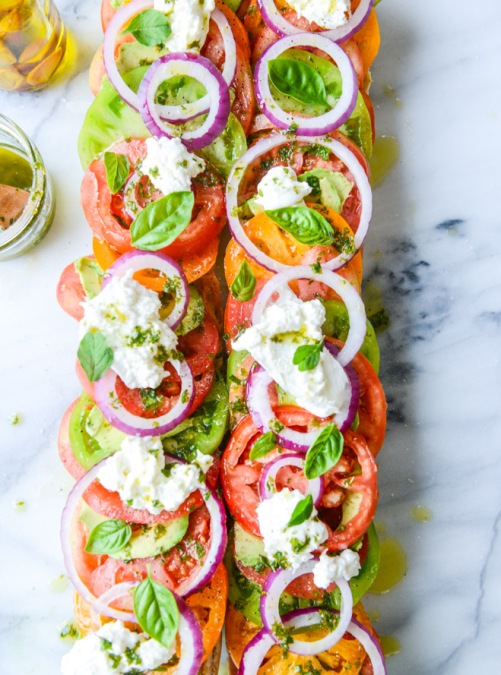
IMG_0173

Veggies:

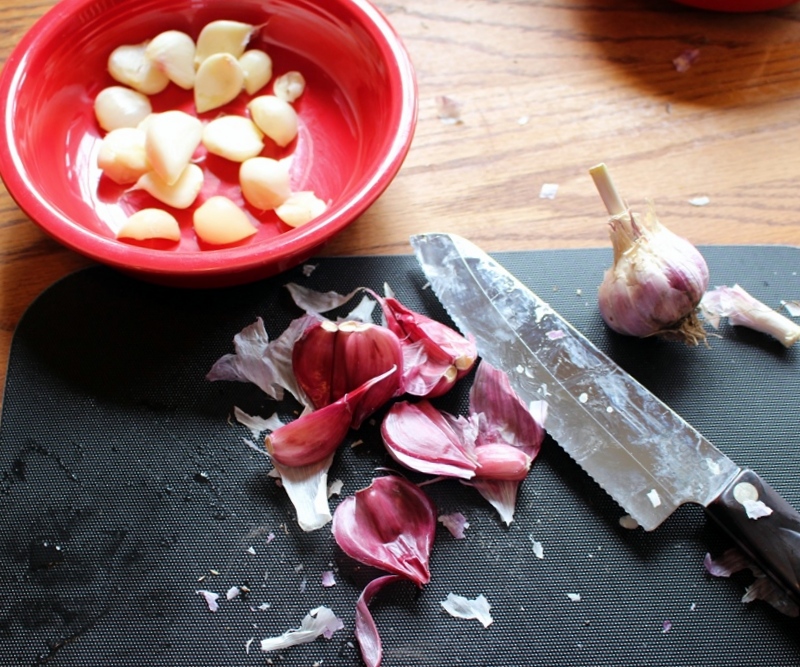
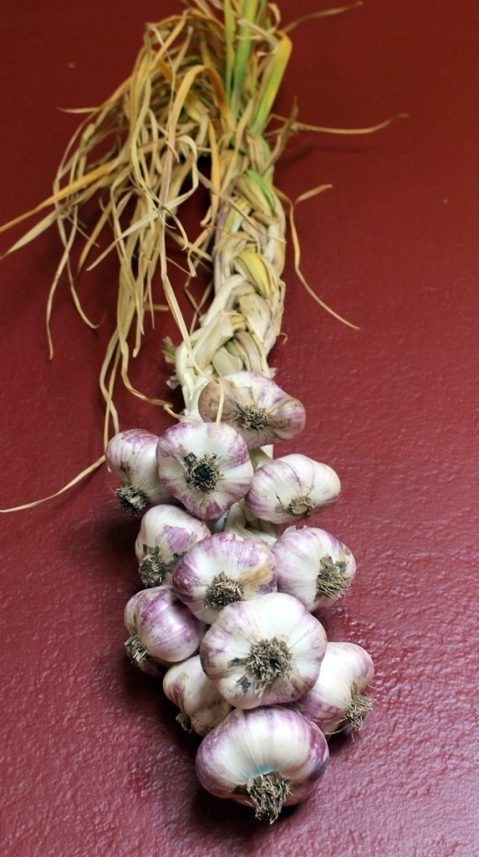
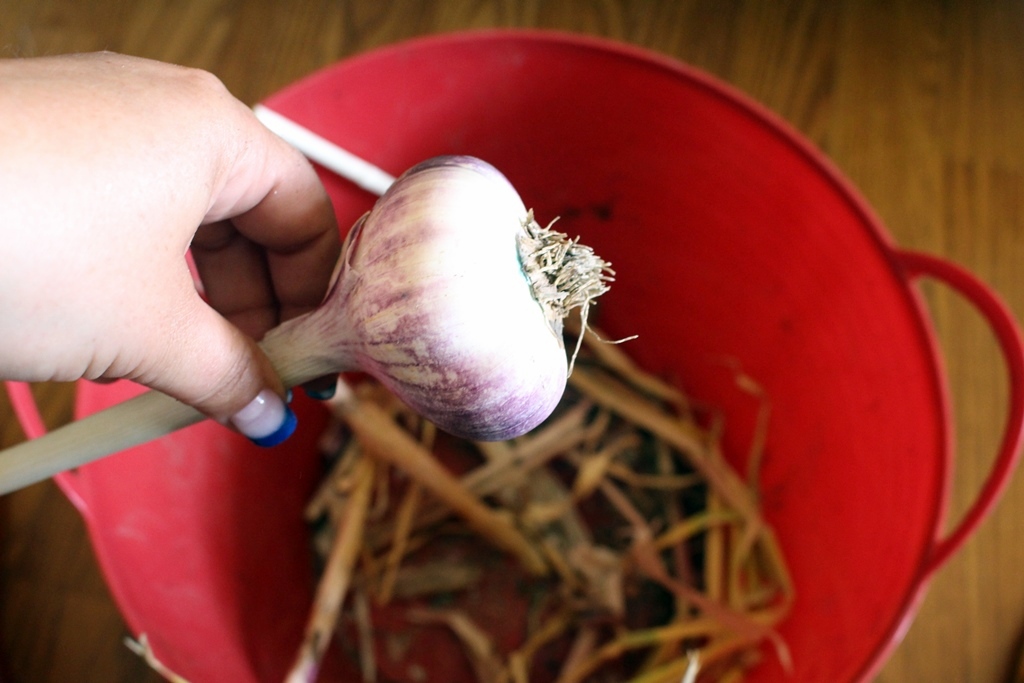
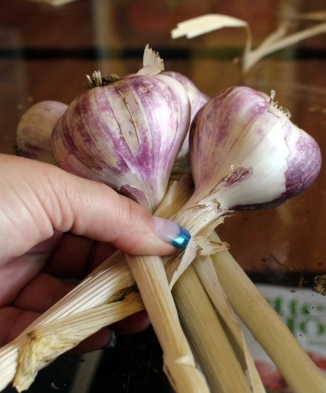
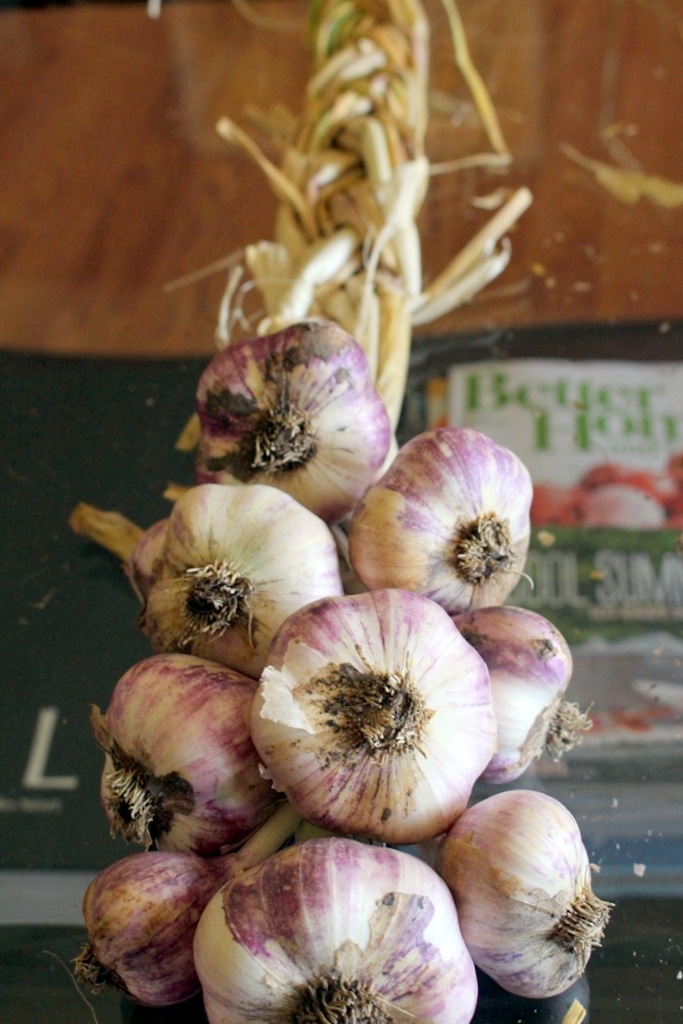
So some things have been harvested like the garlic and unfortunately the onions.

onions

I’m not really sure what happened. One day all the stems were up and happy, the next they were all bent in half. No stem = no growth. So I ended up with a bunch a little onions this year. I really was hoping for “bigger than my fist” sized onions like what I had last year. Oh well, you win some, you lose some. I do have a few left that are doing well so we might still get a few monsters before the season is over.

IMG_0132

On the bright side, that left me with some unexpected real estate which I used to plant some more lettuce for the late summer.

The peas finally got the memo and are doing well. I’m really happy with how sturdy the tee pee trellis worked out.

IMG_0137

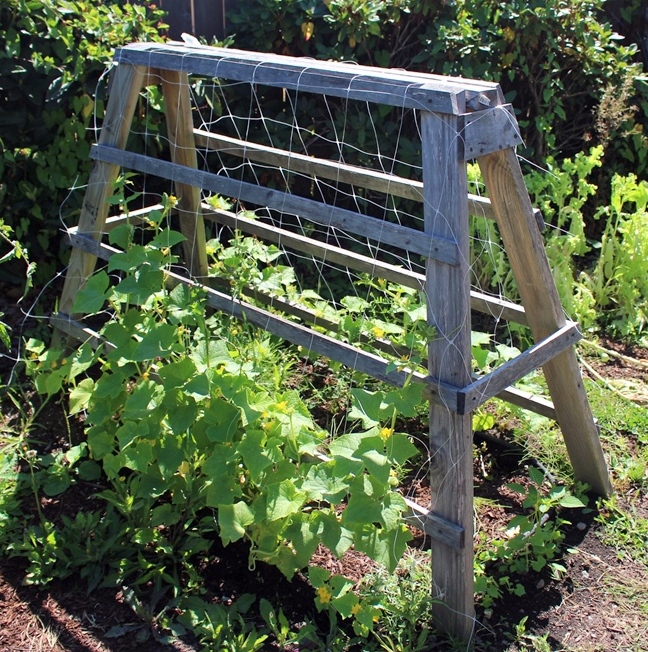
The cucumbers are making their way up their saw horse trellis. I thought they’d be farther along but at least they’re happy. The zucchini are doing great too. I’d love to show you but I keep eating them all!

IMG_0120

As for the tomatoes…

IMG_0144

I can figure out why they are yellowing so much. I’m watering and fertilizing like I always do. Furthermore they’re producing fairly well. I’m just going to blame it on the weather.

Any advice or suggestions are welcome!

The big ones, on the other hand, are doing great! Green tomatoes everywhere, and a couple of red too!

IMG_0126

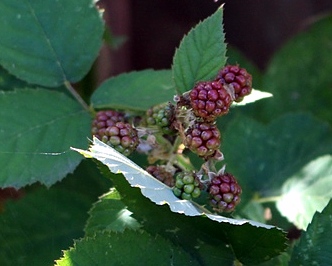
Last but not least, the black berries in the corner of our house are starting to ripen. I can’t wait to make blackberry mojito jam with them!

IMG_0177

How’s it going in your garden?

How to make delicious homemade canned dill pickles. Small Town Girl Blog.

Adventures in Canning: Dill Pickles

A summer of canning would not be complete with out classic dill pickles now would they? I love dill pickles. I’m one of those people who can sit around and eat them straight out of the jar and call it a meal. The salty, vinegary flavor just does it for me. I tried to wait for my seedlings to produce but as of last week,  I’ve picked one… and when your local produce market dangles a 20 lb box of perfect pickling cucumbers in front of you…

pickle

You cave! So this was my first time making pickles and with so many I wanted them to be the way I like them: no sugar, very vinegary and dilly (obviously) with garlic. I consulted the Ball Blue Book first but couldn’t find quite what I was looking for. Most of their recipes call for sugar, and, um no. I hate sweet pickles. It’s just not my bag. Next I searched web to see what other fellow bloggers had done. I soon realized it was simply a matter of determining your water/salt/vinegar ratio. Then add your extras and the rest is simple. So here’s my custom but basic recipe for delicious dill pickles!

Makes 6 wide mouth quarts

Ingredients:

  • 10 lbs pickling cucumbers
  • 10 cups water
  • 3 cups vinegar
  • 2/3 cup pickling salt
  • 12 garlic cloves
  • 6 dill heads

Instructions:

Soak and thoroughly rinse cucumbers. Remove any excess blossoms or stems.

How to make delicious homemade canned dill pickles. Small Town Girl Blog.

I found it useful to separate my cucumbers into small, medium, and large piles.

How to make delicious homemade canned dill pickles. Small Town Girl Blog.

At this point start sanitizing your jars and lid rims. I just use the antibacterial setting on the dishwasher using water only. Works like a charm.

IMG_0034

Add water, vinegar, and salt to a large pot and bring to a boil. I check and stir occasionally as I’m setting everything else up. Once the salt is dissolved, turn the heat down to a simmer.

This is also a good time to get your water bath stock pot warmed up and another smaller pot for warming up your lid caps.

Cut dill heads. I also like to keep some of the bushy branches as they have a bit of flavor too.

IMG_0047

Shell garlic cloves.

IMG_0058

And now were ready to can!

Start with however many cans you can fit in your stock pot. For me, it’s 4 of the quart sized ones. So I take 4 out of the dishwasher and continue to let the rest sanitize.

Put 1 dill head and 2 garlic cloves in each can. If the dill head is very small, I’ll throw some of those bushy branches in too.

How to make delicious homemade canned dill pickles. Small Town Girl Blog.

Add cucumbers lengthwise into the jars. I start with the mediums cucs and then stuff the top with small ones.

How to make delicious homemade canned dill pickles. Small Town Girl Blog.

Ladle hot vinegar/salt/water mixture over cucumbers leaving 1/2 inch headspace.

Cover with lid and cap.

Boil in the water bath for 10 minutes.

What to do with the big cucs?

For me, I ran out of big quart jars before I got to the big cucumbers. So I cut them up and put them in pint jars for gifts. Worked like a charm!

How to make delicious homemade canned dill pickles. Small Town Girl Blog.

Important: Wait at least a week before opening your first bottle. This will help set the flavors.

Enjoy!!

How to make delicious homemade canned dill pickles. Small Town Girl Blog.

Small Town Girl’s Favorite Finds: It’s Tomato Time!!!

Welcome back to another fabulous edition of Small Town Girl’s Favorite Finds. Tomatoes are finally in season and turning up in droves at my local produce market. I’m so happy! There is nothing I love more than fresh tomatoes!! So in honor of this coveted time of year, it only made sense to dedicate a favorite find to some delicious recipe ideas for my favorite vegetable…. fruit…. both! I hope you enjoy. Also check out the Pinterest board for more of my favorite finds!

First up: Panzanella Caprese with Garlicky Croutons from The Kitchen Sanctuary. A traditional Tuscan salad of bread and tomatoes. Nicky uses garlic bread for the croutons and the dressing is rendered from the tomatoes themselves! Genius! This sounds divine on a hot day! Click on the pick to go to the link!

Panzanella-Caprese-with-garlic-croutons-tall

Rustic Tomato Zucchini Tart from Walking on Sunshine. I’m going to try making a single serving of this for lunch soon since it’s just me most days. But Wow! What a delicious way to use up all those tomatoes and fresh zucchini, am I right?? Click on the pic to go to the link!

Rustic Tomato Zucchini Tart Promo Walking on Sunshine Recipes

Heirloom Tomato, Avocado and Burrata Salad on Grilled Garlic Toast from How Sweet It Is. I made this one the other day and it was AMAZING!!! The picture alone sold me instantly. Even better, you make it on the grill so no running the hot oven in the summer! The avocado and tart green tomatoes take this dish to a whole new level. Click on the pic to go to the link!

tomato-bread-I-howsweeteats.com-7

Gazpacho from The Domestic Man. Russ is your go to guy for all things gluten-free and paleo. His recipes are genius as well as tasty. Although I don’t have many diet restrictions, I’m a fan of fresh/paleo foods. If you’ve never had gazpacho, you are missing out, tomato lover. This cold soup is such a blessing on a very hot day. Click on the pick to go to the link!

img_2875

How to Make Fried Green Tomatoes from Big Bear’s Wife. Don’t these look like perfection?? I tried fried green tomatoes for the first time a few years ago and was blown away. This summer I’m having a green tomato infatuation… I fear for my tomato plants! I’m trying really hard just to buy them from the local market in order to allow mine to ripen but they’re just so easy to pick and so delicious to eat!! Click on the pick to go to the link!

green tomatoes


Thanks for joining me for another edition of favorite finds!

Which one is your favorite??

Summer Squash Breakfast Hash. A delicious and healthy way to enjoy your squash in the morning! Small Town Girl Blog.

Summer Squash Breakfast Hash

Summer Squash Breakfast Hash. A delicious and healthy way to enjoy your squash in the morning! Small Town Girl Blog. This is the best breakfast ever!! Seriously. Turning squash into hash browns is healthy, flavorful, and down right awesome!! I didn’t know how much I liked squash until this summer. It’s been a very slow and steady journey over the years but I think I’m finally finding my squash voice. When I first started growing zucchini, I did it just for the zucchini bread, which is delicious, but you don’t even taste the zucchini. It kinda felt like I was cheating. So last year I started playing around with grilling and frying zucchini as many of us novice “squashers” do. Trying to bring out the flavor carefully and cautiously as to not disturb my under developed pallet. During that experimentation I came up with my favorite go to summer lunch: Zucchini Pizza Bites which I now have several variations of and enjoy for lunch almost daily. I’ve been running out of zucchini this year with how quickly I’ve been gobbling it up, and I haven’t made bread once!!! This summer Mrs. Stout introduced me to crookneck quash. Such a hideous name for such a delicious plant. Seriously, they taste like butter! There is no way this could be healthy and yet it is! I’m growing my own next year for sure!! She’s got a few plants and more squash than she knows what to do with. The first time she gave me half a dozen! I panicked thinking “What am I going to do with all these before they rot??” It was time to go to the interweb in search of new ideas! I am not about to waste a gift from a dear friend! No sir! My initial thought was turning the squash into hash and it worked perfectly. Spruce it up with some tomatoes, feta, and crack an egg of the top and you have my new favorite breakfast!! Now I’m calling up Mrs. Stout every week begging for more delicious squash. Stay tuned for other delicious recipes featuring this fantastic veggie.

IMG_9995

Ingredients:

  • 2 small summer squash  – I use zucchini and crookneck
  • 1 tbsp unsalted butter
  • 1/4 cup sliced cherry tomatoes
  • 2 rashers of bacon or 1/4 cup diced ham
  • 3 tbsp feta
  • 2 eggs
  • salt and pepper to taste

Time: 15 minutes

Servings: 1

Instructions:

Shred squash using a wide cheese grater.

IMG_9947

Place squash in a fine colander and use the base of a cup or something similar to press as much of the moisture out as you can.

Place a medium skillet on a wide burner at medium heat.

Melt butter and coat the pan.

Add squash to the pan in a single even layer. It will look like a lot but it shrinks.

IMG_9951.1

Allow the layer to cook for 5 minutes.

Flip the sqash once and flatten it into a single even layer again.

Sprinkle tomatoes and feta over the top and cook for an additional 3 minutes.

Crack and egg on top of the hash and cover the pan for 3 minutes. The excess moisture from the squash will steam the egg perfectly!

Summer Squash Breakfast Hash. A delicious and healthy way to enjoy your squash in the morning! Small Town Girl Blog.

Salt and pepper to taste.

Now of course it looks so pretty in the pan and you could eat it right then and there in all it’s glory….

Summer Squash Breakfast Hash. A delicious and healthy way to enjoy your squash in the morning! Small Town Girl Blog.

But I like to dump it on a plate and mix it all up like a little kid. I think it tastes best that way!

Summer Squash Breakfast Hash. A delicious and healthy way to enjoy your squash in the morning! Small Town Girl Blog.

Enjoy!

The Cadillac Margarita. Made with top shelf liquors, fresh lime, and agave nectar. This is the best margarita you will ever have!!!

The Cadillac Margarita

This is the tale of one girl and her quest for the holy grail of margaritas. I have loved margaritas since I became of legal drinking age. It was one of the first cocktails I tried and has remained dear to my heart over the years. Shortly after I turned 21, I was promoted to bartender at the local Black Angus where I was a part-time hostess while going to school. I was trained by two powerhouse gals, Kandy and April. The three of us became fast friends and often went out for cocktails together after our shifts. Monday’s were special evenings for us since it was the only evening all 3 of us had off and Ally McBeal was on!! I looooooove Ally McBeal! So each Monday, we would congregate to Kandy’s home for dinner, Ally McBeal, and of course, margaritas. We would debate over our prefered tequilas, and mixers all the time. However we all agreed that the Cadillac margarita was, by far, the best type of margarita out there.

The Cadillac Margarita. Made with top shelf liquors, fresh lime, and agave nectar. This is the best margarita you will ever have!!!

The Cadillac Margarita is considered by many, the best margarita out there. It is always made with top shelf ingredients and augmented with an orange liquor, typically Grand Mariner or Cointreau. Most Mexican restaurants will have a version of this on their cocktail menu, just look for the most expensive one. Believe me, it’s worth the extra couple of bucks!

One of my goals for the summer was to do a couple of blog posts showcasing my favorite cocktails. This was at the top of the list. But in all honesty, it had been some time since I made a margarita for myself. Why? The only way I knew how to make them is with sweet and sour mix. Now, when I was 21, I didn’t care very much about what I put in my body, so sweet and sour mix seemed just dandy. These days, my tastes have sophisticated particularly in the margarita department. A freshly made margaritas with real limes is far superior to that bottled crap. I mean, look at the ingredient list:

Water, High Fructose Corn Syrup, Citric Acid, Sodium Citrate, Sodium Hexametaphosphate, Acacia Gum, Potassium Sorbate (Preservative), Polysorbate 60, Natural Flavors, Ester Gum, Sodium Metabisulfite (Preservative), Calcium Disodium EDTA (to Protect Flavor), Yellow 5, Yellow 6.

No thank you!! I firmly believe all margarita lovers should unite and shout:

IMG_1832

Good lord Faye Dunaway was terrifying!! Do you think if a bartender saw that coming at them they would serve that garbage? I think not!

So I try to keep my margarita drinking to places with a reputation for quality cocktails.  However, I have learned that even these places will cheat. I went to a certain swanky Mexican fusion restaurant in downtown Bellevue (the hoity toity neighbor of Seattle) recently where it says at the top of the cocktail menu: All Margaritas are crafted with 100% Blue Agave tequila and fresh juices…. and then I watched the bartender fill up half the glass with sour mix! I couldn’t believe it! I had half a mind to say something but decided against it since it was happy hour and I was already getting the drink for half price.

And why am I so particular about quality margaritas? It’s one of those things where once you have an exemplar, there is no turning back.

The Cadillac Margarita. Made with top shelf liquors, fresh lime, and agave nectar. This is the best margarita you will ever have!!!Which brings us to last June where I found myself at a teacher professional development summit in San Diego. Having never been to San Diego, it was only natural to spend the evenings exploring the area. On our last night, we decided to check out a Mexican Restaurant in the Gas Light District called La Puerta. La Puerta takes great pride in what they serve, practically everything is made fresh daily with the best ingredients. This is the place where I had The Best Margarita EVER!!! …. and another….. and another. The angels came down from heaven, Jimmy Buffet started singing, I was riding a unicorn on the beach…. you get the idea. It was beyond perfection. After getting down off my unicorn I grabbed the menu and took another look at the ingredients. Pure agave tequila, ok. Cointreau, sure. Lime, duh! Agave nectar….. huh? Never heard of that. After some brief googling I learned that it’s a natural sweetener much like maple syrup but made from the same plant that renders tequila. A ha! This is the key to getting past the sweet and sour mix problem. If I add a little of this, some sweetened lime juice and fresh lime, we should be in business!! And boy, were we ever!! So why don’t I shut up already and tell you how to make it right?? Right!

Ingredients

  • 1 oz. pure agave tequila – Cazadores and Hornitos are my favorites.
  • 1/2 oz Grand Mariner or Cointreau
  • 1 lime wedge
  • 1 oz sweetened lime juice
  • 1 tbsp agave nectar – you can find this in the organic baking section of your local grocery store
  • 1 oz water
  • kosher salt (optional)

Tools: Cocktail Shaker and Muddler

Instructions

Add tequila, Grand Mariner, and the lime wedge to a cocktail shaker and muddle.

Add sweetened lime juice, agave nectar, and water to the cocktail shaker and shake.

Salt the rim of your glass and add ice.

Strain liquid into glass and enjoy!

The Cadillac Margarita. Made with top shelf liquors, fresh lime, and agave nectar. This is the best margarita you will ever have!!!

The Great Redneck Scavenger Hunt. Part 2: On the Road Again

Jeff Foxworthy…. That is where this idea began. For over 30 years he has been listing the indicators that will gauge whether you are indeed a redneck. When I first heard some of these, long before I moved to a small town, I thought they were funny but not as common as he made them out to be. Boy, was I wrong, many of his statements are now found in my own home! As I looked around I found more and more!! Then it occurred to me, how much fun would it be to turn this into a game! A scavenger hunt!

Mr. Foxworthy’s definition of redneck is “A glorious absence of sophistication” Oh yes, it is glorious! Truly. I love the comfort and ease that comes with living in a redneck town. You don’t have to put on airs for anything you don’t want to. As my Mountain Man would say, “It’s just how we do.”

He also states that you can’t make fun of redneck unless you are one. I know Mountain Man “are” one. I’m trying really hard to be one too! It’s tough! Often rational thought beats it out of me so often. That is why I consider myself still an aspiring small town girl. As the years roll by, little things do change. I’ve traded my jackets for hoodies and sneakers for cowboy boots. I listen to country music… and enjoy it enthusiastically which I never thought would happen. I’ve heard myself say words like “reckon” “yonder” and “darn right.” Sometimes it even startles me when I hear myself. So I’m getting there.

As I looked around my town, I find many redneck indicators that Jeff had not mentioned before. I felt it was only acceptable to create my own as well as use his when they crossed my path. I hope you enjoy my new favorite game. Here we go:

Jeff’s

Redencks love to show off their money…. that’s why everything is proudly displayed in our front yard.

11717335_987823124581567_287692939021306626_o

And this is ours. As you can see Mountain Man got a new truck recently. It’s great, all the bells and whistles plus it tows a lot better than the old one which is ready to be put out to pasture. For only two people living in a small house, he we sure do have a lot of vehicles. I remember my mother reprimanding me early on in moving to a small town about this. She said: “You need to move or get rid of some of those trucks out front before the neighbors start complaining!” After doing a quick assessment of the neighbors parking areas and their own front yard collections, I replied “Well gee Mom, we’re just tying to fit in!!”

If fewer than half your cars run… you might be a redneck.

IMG_1820

Oh did you think those were our only trucks? That’s sweet. No no, there are two Toyotas in the back. Now here is where MM and I differ in opinions: He would state that these two run, which is true, I suppose. You can turn a key and something will happen. But they obviously aren’t going anywhere now are they?  So let’s do a quick tally: 2 in front that work, 2 in back that don’t…. so I guess we’re breaking even right?

IMG_1816

Wrong! Here’s the other one in the garage that doubles as a storage/ dumping ground. So in essence, we do fit into this category for the moment, but just barely. #whatcarbonfootprint? Upon showing you this window of our life, I can only hope you won’t judge us too harshly. I know it’s not a very conventional lifestyle and this is where rational thought beats out the redneck in me. But I love my man and he wouldn’t be him if it weren’t for his hobbies and love for all things with motors. Let’s be real, we all have those things that drive each other crazy, and I’m far from perfect as I’m sure he’d tell you if he were a blogger, lol. So I shrug my shoulders and try to adjust to living in a world of motor oil and grease.

Mine

If you’ve ever been in a traffic jam involving cattle… you might be a redneck

FullSizeRender1

Yes this happens to me….often. It’s the only traffic jam I don’t mind. Most times I can’t help but laugh. When you live in a small town, chances are there will be cattle farmers, and chances are they will have to herd the cattle from one side of the road to the other. Mooooooooove!

If you consider driving a quad a valid and legal mode of transportation… you might be a redneck.

FullSizeRender

MM has told me tales of small towns where driving quads on the road is legal…. this just recently passed in our small town and is not an uncommon sight. When I saw this coming down the highway I had to be that little busy body spy who rolled down her window and sneakily snapped this pic as he drove by…. on the highway… going 40 mph. What I didn’t notice until I got home and looked at the picture was the child scrunched up in the back! OMG! I was shocked and in my shock showed MM expecting a reaction. What I got was a shrug of the shoulders and this response “Well they’re wearing helmets aren’t they?” …. Ugh! Rednecks!

Thanks for joining me for another edition of The Great Redneck Scavenger Hunt! I hope you’ve enjoyed. If you have any redneck-ism about being on the road feel free to share in the comments!!


Small Town Girl’s Favorite Finds

Welcome back to another fabulous edition of Small Town Girl’s Favorite Finds. I hope your week is going well! Here’s a little blog love for some of my absolute favorite posts from last week. I hope you enjoy. Also check out the Pinterest board for more of my favorite finds!

Up first: Greek Chicken Salad from What’s Gaby Cooking. I’m trying this out later this week for dinner. I love all things greek! Opa! I make a similar greek salad as a side dish but I love the addition of a delicious marinated grilled chicken over a bed of arugula. Yes Please! Can’t wait to make this one, Gaby! Click on the pic to go to the link!

WGC-Greek-Chicken-Salad-copy

Baked Caprese Eggs with Pesto from For the Love of Cooking. I had a baked egg breakfast just last week in Portland for the first time! It was incredible. While sitting there devouring breakfast, I thought, a caprese version would be incredible! A couple of days later I found this!  I love when fellow bloggers read my mind! If I had my way, a butler, a personal chef, and a maid, I would have these for breakfast every morning. In the meantime while I’m waiting for my money to come in, ha ha ha, I’ll just have to try making this myself. Click on the pic to go to the link!

DSC_59841

The tomatoes are coming in and canning is imminent so finding some good recipes is a must! With a title like: Simply the Best Tomato Sauce by The Happy Idiot, how could I not share! Besides the obvious, there is also herbs, onions, celery, and carrots in the mix which, I’m certain, makes this recipe far superior to plain Jane tomato sauce. I will definitely be making a batch of this deliciousness. Click on the pic to go to the link!

thi-jar1

Free Organic Fish Fertilizer for the Garden from Idlewild Alaska. Ok so maybe this one is just for me since I fish and garden but I had to share. Besides the fact that I am THRILLED to have found a blogger with such specific similar interests, this is something Mountain Man and I have been talking about doing for a long time. I was reserved about trying it because  meat tends to bring on the bugs and stink but this method seems sound. What a great post! Click on the pic to go to the link!

fishfert2-268x500

Garlic Scapes Pesto from A Dish of Daily Life. You may already know that I discovered garlic scapes this year and LOVE LOVE LOVE THEM!!! So all things garlic scapes make me pretty happy these days. They must be out of this world in a pesto! Yowza! Click on the pic to go to the link!

Garlic-Scape-Pesto

Last but not least: Peach Moscato Smoothie from Cooking with Curls. I’ve been following Lisa for about a year now. Her cooking is phenomenal but her drinks and photography of said drinks are out of this world! I love them all always look forward to the next post. She should open a cocktail lounge! This is one of her most recent examples of cold beverage awesomeness that I can’t wait to make. Click on the pic to go to the link!

Celebrate-sisterhood-and-friendship-with-a-sweet-sassy-Peach-Moscato-Smoothie-cookingwithcurls.com-MiddleSister-DropsofWisdom


Thanks for joining me for another edition of favorite finds!

Which one is your favorite?

Mom's Meaty Enchiladas

Mom’s Meaty Enchiladas

Mom's Meaty EnchiladasBecause sometimes you just want meat! I’ll admit I’m not a big carnivore. I like a little meat and a lot of pasta, veggies, sauces, and cheese. But, on occasion, meat just sounds great! That’s where this completely non – authentic, ultimate comfort food, super meat bomb comes into play. Mom has been making this since, like, forever! It’s been in the rotation since I was little. When I moved away for college, she gave me a recipe book with a couple of our family favorites including Sour Cream Chicken, Chicken and Rice, and this gem. And these meals were so crucial to my education in cooking as well as getting decent nutrition during finals week. Meat + carbs = brain food people!!  Every time I make it, it’s like being a kid again sitting around the dinner table talking about piano lessons or future family vacations. Oh nostalgia.

These days, when I make it, I like to add pico de gallo and guacamole so I feel like I’m getting some veggies in there. This dish would also go great with Mexican style beans and rice.

Oh did I mention how EASY this is too make?? If you have a family to feed, or love leftover lunches this is a must make! It only takes 20 minutes to prepare and look at the list of ingredients below! I’ll wait….. did you look? You probably already have them all. Am I right?

Ingredients:

  • 1 1/2 lb ground beef
  • 1 medium yellow onion, chopped
  • 2 tbsp taco seasoning
  • 1 can beef or turkey chili
  • 6 medium sized flour tortillas
  • 3 cups Mexican style shredded cheese

Prep time: 20 minutes

Cook time: 30 minutes

Instructions

Preheat oven to 350.

Cook ground beef, onion, and taco seasoning in a skillet.

IMG_9749

Drain and set aside.

In a wide bowl add chili and an additional can full of water. (I got lazy and used a large skillet instead of digging for a big bowl. No I did not heat up the chili at all, just to be clear.)

IMG_9751

Set up your assembly line: chili with water, tortillas, shredded cheese, taco meat, greased 9X13 pan, and a plate to roll the enchiladas on.

IMG_9753

Dip a tortilla in the chili/water mix. Yes, this is your very unauthentic enchilada sauce… and it is awesome!! Just trust me on this.

IMG_9757

Lay it on your work plate and add taco meat and cheese. You are not going to fold in the ends of the tortilla so go ahead and put lots of taco meat in each!

Mom's Meaty Enchiladas

Roll and place in the pan seam side down. Repeat steps for the other 5 enchiladas.

Mom's Meaty Enchiladas

Bake for 15 minutes.

Strain chili/water so all that remains are the beans and meat.

Remove enchiladas from oven and sprinkle beans and cheese over the top.

Mom's Meaty Enchiladas

Bake for an additional 15 minutes.

Serve with your favorite Mexican sides:

My recipe for: Pico De Gallo

My recipe for: Guacamole

 IMG_9774

How to braid garlic with video tutorial!

Braiding Garlic

IMG_1696Last year, I grew enough garlic to attempt braiding it…. which did not go well. I figured it’s gotta be just like braiding hair right? Wrong! I tried adding multiple heads and finally threw my hands up and just did simple braids with 3 bulbs. Ugh! Horrible! I was never happy with the result. I did write a cute little haiku about the experience but that was about the extent of my talents in the garlic kitchen decor department. Or so I thought.

Fast forward to fall and I find myself planting twice as much garlic as before. Why? I made new friends. Friends that grow a lot of garlic. Suddenly I find myself presented with all these new interesting varieties I’ve never heard of: Kilarney Red, Inchelium Red, Lorz Italian. What’s a garlic lover to do? Grown several of each of course! For more on my little garlic growing operation, check out this post: Go Garlic Grow.

Which brings us to yesterday:

How to braid garlic with video tutorial!

It appears I’m going to have to revisit my epic fail from last year and try to improve upon it…. So I do what any red-blooded American girl would do, I Googled it. Sure enough, the YouTube videos abound. After reviewing a few, I felt that the one presented by Garden Nerd did the best job of demonstrating how to make a beautiful braid. Furthermore, the blog is GREAT and I am looking forward to reading their other posts in the near future. #newfan!

So here I am, ready to attempt the elusive garlic braid one more time with a little help from Christy of gardennerd.com.

How to braid garlic with video tutorial!


Step 1: cut the roots and clean off the dirt. Check!

How to braid garlic with video tutorial!

Step 2: Tying together 3 bulbs. The one in the center is slightly bigger as suggested. Christy ties hers together with twisty ties, but I didn’t have any on hand so I used twine and it worked fine.

How to braid garlic with video tutorial!

Next, carefully follow the video step by step…. so far so good.

How to braid garlic with video tutorial!

Three important tips:

1. Use soft neck garlic.

2. Carefully bend the stems.

3. Keep the braid as tight as you can get it.

OMG I did it!!!

How to braid garlic with video tutorial!

And then I did it again!!

How to braid garlic with video tutorial!

Thank you Christy from Garden Nerd for your excellent instructional video!

Anyone else out there braiding garlic this summer?


How to can delicious dilly beans. Small Town Girl Blog.

Adventures in Canning: Dilly Beans

How to can delicious dilly beans. Small Town Girl Blog. 
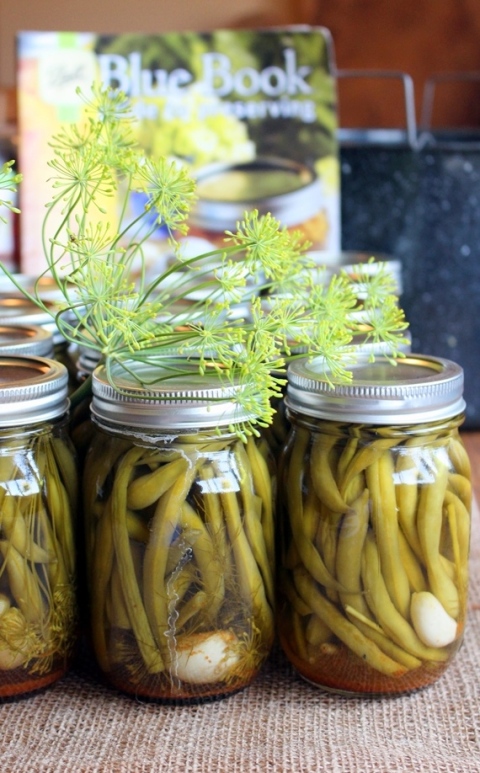
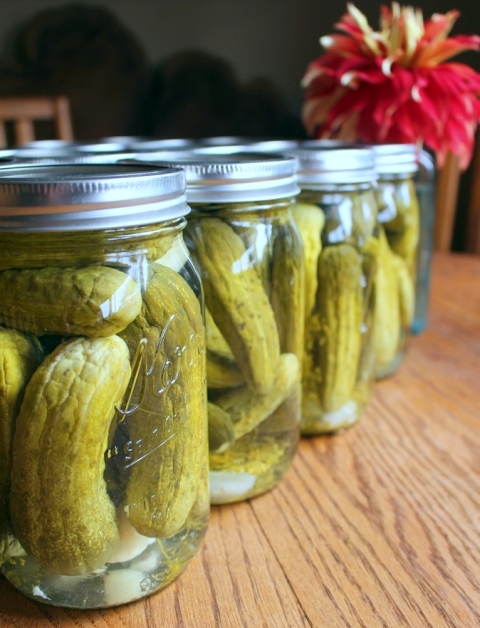
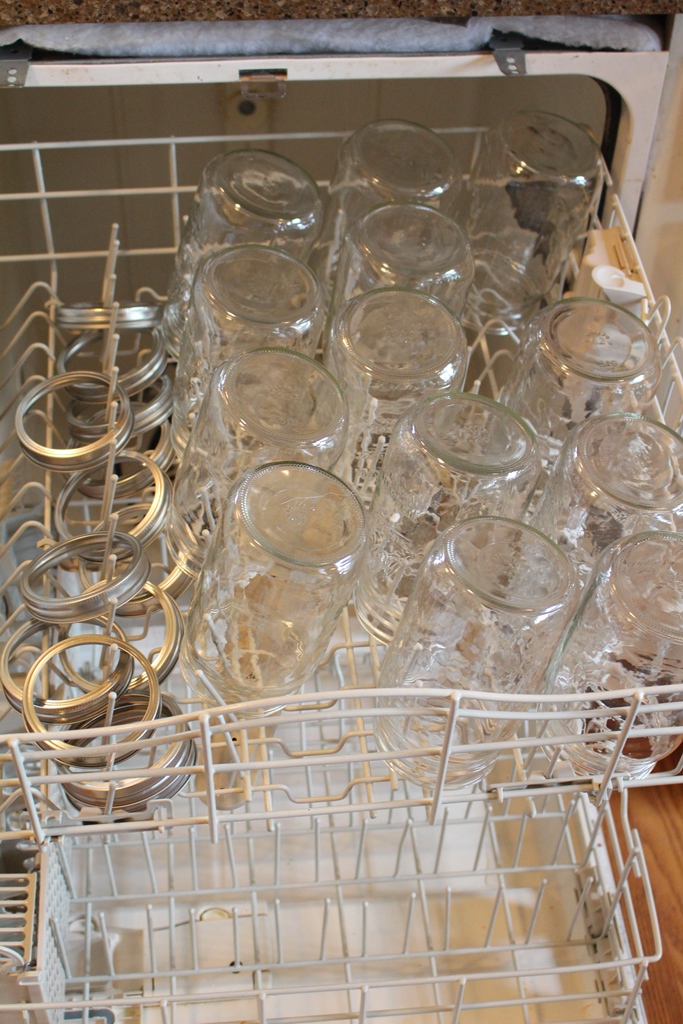
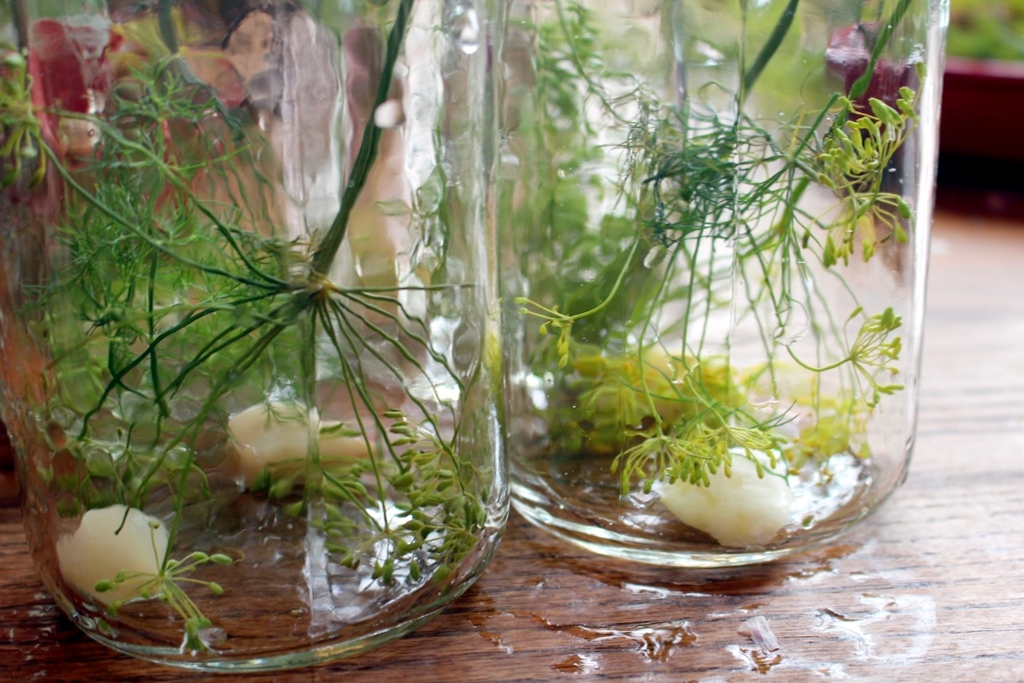
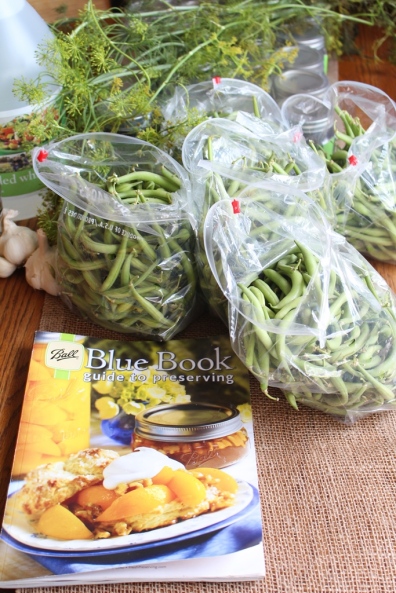
Last summer I discovered the wonderful world of canning. It’s the crafty, rewarding, and a great way to stay productive in the summer. As a teacher, I’ll admit, I get lazy and out of sync when I don’t have a schedule… Canning is on of several activities that keeps me busy and focused during long breaks from work. I would recommend it to anyone who is looking for a new hobby or just something different to do the next time you find yourself hanging around the house being bored.

The best place to start is by purchasing the Ball Blue Book. It explains everything in fantastic detail and has a wealth of recipes. For more information, check out the Ball getting started website.

Dilly Beans was the first recipe that I tried on my own and it was EASY! My friend, Mrs. Awesome, makes these every year with her daughters. They are a coveted family treat in their household. Last year, she gave us a couple extra cans and they were gone in 3 days! Once they were gone, I knew I had to start canning if we were going to have a steady supply of this spicy pickled goody in our home. The recipe calls for 2 lbs of beans which sounds substantial at first… until you notice it only makes about 4 jars. Between MM and I, those are as good as gone in a week. That simply will not do! So, this year I decided to start with 5 lbs which yielded 12 cans. That’s way more like it!

There is absolutely no reason to deter from the genius that is the Ball Blue book nor do I see a reason to type out the recipe, so here ya go:

How to can delicious dilly beans. Small Town Girl Blog.

Below are a few tips and tricks I’ve learned along the way:

First, you need to wash and cut the beans. This is the most tedious part of the whole operation. Make sure you get rid of the stalks in particular.

IMG_9600

I like to add the dill, cayenne pepper, and garlic to the cans before stuffing them with beans. It’s easier. It says to use a whole head of dill per can but the ones I got were huge so I broke them into thirds and it worked great. I also like using the stringy leafy bits as well as the heads.

How to can delicious dilly beans. Small Town Girl Blog.

Then stuff the beans lengthwise into the cans.

How to can delicious dilly beans. Small Town Girl Blog.

After adding the boiling liquid, you’ll want to get the air bubbles out using headspace tool. You will probably find that you may be able to stuff a few more beans in the can too…. do it!!

Seal the cans and put them in a 10 minute water bath.

I like to wait at least 4 days before diving in. It gives the flavors a chance to really sink in.

Enjoy chilled.

How to can delicious dilly beans. Small Town Girl Blog.