Garden Update: July 2015. Small Town Girl Blog.

Meanwhile, Back in the Garden… July 2015

It has been a strange summer in Washington…. very strange. When you think of Washington state (particularly Western Washington) , what is the first thing that comes to mind? Apples? Mountains? Probably most of you thought rain right? We’ve had one decent rain in over a month, that’s it. It’s so dry most of the ground is dusty. The ground is never dusty on this side of the Mountains! Temperatures most days  are in the mid 80’s to high 90’s and it just won’t let up. We are in dire need of some serious moisture! I feel like I’m gardening in a completely different zone!

It’s funny, I think I do this every summer: I expect the garden to be in full harvest mode in July and it’s never really there until August. It’s like my harvest clock is confused. I then proceed to feel aggravated as if I have failed when, in fact, I’m almost there. So I’m trying really hard to keep that in mind as the month comes to a close and I anxiously wait for the fruits of my labor to perk up. Come check it out!

Flowers

Lets start with the pretties. I’m super proud of those. They are rockin and a rollin!

This is my very silly and probably favorite hanging basket. I think it looks a bit like an octopus with those tendrils which led to MM nick naming it the “Kraken Basket.”

IMG_0151

The perennials are all in various stages of blooming. They’ve had tons of visitors from bumble bees to butterflies and even the hummingbird occasional .

IMG_0162

Some of the new editions that I got at the Northwest Flower and Garden Show are still really tiny. Like the Astrantia Major:

IMG_0170

Yep. this is all that it’s had for months! I don’t know what the deal is. I’m just sticking to the “Don’t F@#$ with it” method since I’m afraid if I give it too much attention it will die. My plan is to pot this little guy and bring it in before the frost this fall. Hopefully it just needs another year to build up.

Any thoughts on why this little guy isn’t getting any bigger?

As for the dahlias….

IMG_0185

It seems like every day I go out to the dahlia jungle, and a new one opens up…

IMG_0113

Today’s model is called “Pooh”

IMG_0173

Veggies:

So some things have been harvested like the garlic and unfortunately the onions.

onions

I’m not really sure what happened. One day all the stems were up and happy, the next they were all bent in half. No stem = no growth. So I ended up with a bunch a little onions this year. I really was hoping for “bigger than my fist” sized onions like what I had last year. Oh well, you win some, you lose some. I do have a few left that are doing well so we might still get a few monsters before the season is over.

IMG_0132

On the bright side, that left me with some unexpected real estate which I used to plant some more lettuce for the late summer.

The peas finally got the memo and are doing well. I’m really happy with how sturdy the tee pee trellis worked out.

IMG_0137

The cucumbers are making their way up their saw horse trellis. I thought they’d be farther along but at least they’re happy. The zucchini are doing great too. I’d love to show you but I keep eating them all!

IMG_0120

As for the tomatoes…

IMG_0144

I can figure out why they are yellowing so much. I’m watering and fertilizing like I always do. Furthermore they’re producing fairly well. I’m just going to blame it on the weather.

Any advice or suggestions are welcome!

The big ones, on the other hand, are doing great! Green tomatoes everywhere, and a couple of red too!

IMG_0126

Last but not least, the black berries in the corner of our house are starting to ripen. I can’t wait to make blackberry mojito jam with them!

IMG_0177

How’s it going in your garden?

How to braid garlic with video tutorial!

Braiding Garlic

IMG_1696Last year, I grew enough garlic to attempt braiding it…. which did not go well. I figured it’s gotta be just like braiding hair right? Wrong! I tried adding multiple heads and finally threw my hands up and just did simple braids with 3 bulbs. Ugh! Horrible! I was never happy with the result. I did write a cute little haiku about the experience but that was about the extent of my talents in the garlic kitchen decor department. Or so I thought.

Fast forward to fall and I find myself planting twice as much garlic as before. Why? I made new friends. Friends that grow a lot of garlic. Suddenly I find myself presented with all these new interesting varieties I’ve never heard of: Kilarney Red, Inchelium Red, Lorz Italian. What’s a garlic lover to do? Grown several of each of course! For more on my little garlic growing operation, check out this post: Go Garlic Grow.

Which brings us to yesterday:

How to braid garlic with video tutorial!

It appears I’m going to have to revisit my epic fail from last year and try to improve upon it…. So I do what any red-blooded American girl would do, I Googled it. Sure enough, the YouTube videos abound. After reviewing a few, I felt that the one presented by Garden Nerd did the best job of demonstrating how to make a beautiful braid. Furthermore, the blog is GREAT and I am looking forward to reading their other posts in the near future. #newfan!

So here I am, ready to attempt the elusive garlic braid one more time with a little help from Christy of gardennerd.com.

How to braid garlic with video tutorial!


Step 1: cut the roots and clean off the dirt. Check!

How to braid garlic with video tutorial!

Step 2: Tying together 3 bulbs. The one in the center is slightly bigger as suggested. Christy ties hers together with twisty ties, but I didn’t have any on hand so I used twine and it worked fine.

How to braid garlic with video tutorial!

Next, carefully follow the video step by step…. so far so good.

How to braid garlic with video tutorial!

Three important tips:

1. Use soft neck garlic.

2. Carefully bend the stems.

3. Keep the braid as tight as you can get it.

OMG I did it!!!

How to braid garlic with video tutorial!

And then I did it again!!

How to braid garlic with video tutorial!

Thank you Christy from Garden Nerd for your excellent instructional video!

Anyone else out there braiding garlic this summer?


Weed: It’s a 4 Letter Word

IMG_9180 This is my diatribe to the bane of all gardeners. The one true headache of the summer. Those little, practically inanimate creatures that laugh at me day in and day out as I struggle to take purchase is what is obviously their realm. Yes I’m talking about weeds.

Weeds are nature’s graffiti. ~ Janice Maeditere.

Isn’t that the truth!?! I’m sorry in advance if you don’t mind weeds or think they’re kinda cute, this post is not for you. And furthermore, what is wrong with you? Weeds suck!! Grrrragh! I could spend all day spewing out four letter words in my back yard over these stupid plants. How dare they encroach upon my well thought plans. Who do they think they are to challenge my authority in my garden!?!? I can hear them snickering at me right now as I write this.

Being weed free is like everything else in life that would be great but nature won’t let it. For example, eating what ever you want and not gaining weight, or being rich without putting forth the effort. For most of us, these things just aren’t reality. Weeds are something you work at and whether you like it or not, they’re here to stay…. with a vengeance.

So what do we do? What is the key to a perfectly manicured garden? Is there a way to avoid the back breaking work that is pulling out these suckers? Is there an easy button for ridding ourselves of loathsome plants? Unfortunately, the answer is no. Hard work, dedication, and resolve to have a successful garden is what keeps us going back again and again to address these bothersome bastards.

IMG_9173Trust me, I’ve tried just about everything; natural remedies, burning, Round Up, Napalm…. just kidding but you get the idea. I remember moving in to this home 3 years ago and going after the dandelions like a beast. I thought, if I can get them all out this summer and the summer after that, maybe I can permanently alter my backyard’s ecosystem. Guess what, it didn’t work. I’m continuously accosted by this species and all of their bretheren. At some point you realize that there is nothing to be done. Changing the weed culture of your back yard is much like trying to literally turn the tide, it’s beyond your control.

Crabgrass can grow on bowling balls in airless rooms, and there is no known way to kill it that does not involve nuclear weapons. ~ Dave Barry.

But do not despair, there are some methods I use that are fairly successful at keeping this drama at least manageable. After all, I have to if I want my garden to be healthy and pretty right? But remember, there is no easy button. Weeding is work and it sucks, the end!

weeding

What methods to use where:

Kill em all!

For areas that are gravelly or pavement where you don’t care about killing the ground you can use chemicals. Yes, they are not environmentally friendly and yes you’re probably endorsing controversial companies like Monsanto. But they work. They kill everything within several feet of where you spray, which is scary when you think about it. I often wrestle with purchasing the stuff or not simply out of principle. Still, it is gratifying to watch it all die and for the most part not come back for the rest of the season. Do be aware though, it’s not permanent by any means, they’ll return next warm season, the little f*#kers always do!

This year I haven’t played the Round Up game… yet. Maybe it’s because it’s been so hot and dry, most of the plants in the gravel are drying out and dying on their own. Maybe it’s because I’ve had a very busy summer and I haven’t had time. Maybe it’s because I don’t like using the stuff because of how toxic it is. Maybe I’m just lazy…..yeah that’s probably it.

Lawn

For your lawn, you pretty much need to use some kind of chemical. If you go in there with a spade and start digging, the end result looks a lot like green swiss cheese. Weed and feed products come in all shapes and sizes and do a great job at what they advertise. They kill the weeds while feeding the grass. Oh hey! There’s and easy button! It’s about the only one I know as far as weeding goes but this is by far as good as “effort free” gets in the game.

However, if you have moss in your grass… you’re pretty much screwed. Again, you have to start with chemicals to kill the moss. Then it’s on to thatching. Have you ever thatched before? It’s back breaking work. Basically you’re raking the dead moss out of the grass. I tried it last year for a few hours each day. I barely got 1/2 of my piddly front yard done. I threw up my hands on the last day and decided to live with the moss. P.S. it’s a lot easier to “live with” these kind of things when you don’t own the home. Mountain man and I have talked about completely replacing the front lawn but it’s not worth it if we’re planning to buy our own house in a year.  Besides, it looks grassy on top and the moss is deliciously squishy on bare feet. Honestly I didn’t know it was a problem until MM pointed it out.

Flowers and Vegetables

IMG_9643Now onto the stuff that matters. What to do with weeds around the stuff that you care about. The stuff that you want to grow, harvest, and enjoy. There are lots of methods out there, and believe me, I’ve tried many, but here’s what works best for me:

Prevention:

It is the best medicine and that medicine in gardening is called mulching. Mulching is essentially laying down a layer of stuff over your soil. It deters many weeds from growing and helps the soil retain moisture for longer periods. Win/win right? Examples of mulches include bark, straw, compost, and stones. Better Homes and Gardens made a mulch quiz to help you figure out what kind of mulch is best for your landscape. For me, I use bark. It works and looks great in the flower beds and definitely tames them in the veggie garden.

IMG_9174

See how there’s mulch around the onions on the left and bare soil on the right. Funny how the weeds grow right along the edge of the mulch. It’s like they’re trying to break through into the onions!

Removal:

But make no mistake: the weeds will win; nature bats last. ~ Robert M. Pyle.

And they always do. So you need to know how to remove them properly. The reason weeds are so prolific is because of their root systems. Some weeds have sprawling networks of roots that continuously grown underground. Others, like dandelions, have huge taproots (like carrots). Regardless of the type, if you do not remove the entire root, guaranteed, the plant will come back.

To start, you need to have the right weapons before going into battle: a bucket to put your kill in, a spade and a weed fork (your weapons), gloves to spare your hands from the prickly ones (your shield), water for hydration, a knee pad so you don’t trash your knees from being on them all day, scissors for any deadheading or other such trimming you find along the way, and a frisbee…. a frisbee? Oh that darn dog! Ok, a frisbee to throw for the dog when you need a break.

IMG_9185

Ideally, you’ll want to wait until the ground is moist from a good rain. This will help loosen up the roots and make them easier to pull. Your first job is to find the weed’s source. If it’s a sprawling plant, use the forked rake to move the plant around and loosen the soild until you find the stem that leads into the ground.  Use the spade to loosen the soil around the stem. Then pull slowly and straight up. If the plant snaps without the roots attached, then you have to dig them out (which is a total pain). If you don’t dig them out, yup, you guessed it, they’re coming back. I personally have no desire to play the “dig up the beds to find the root system game.”

So I choose to admit defeat for the moment and try again once it regrows. Honestly 1 out of every 4 or 5 I pull will break. It’s just how it is.

IMG_9633As for the King Asshat of the weeds, there can only be one, the dandelion. Oh how I hate this villain of the garden. Do you remember being a kid, picking the poof balls, making a wish, and blowing them away? Um, hello! You’re spreading the seeds!! What the hell were we thinking?? I am never teaching my children to do that….EVER!!!

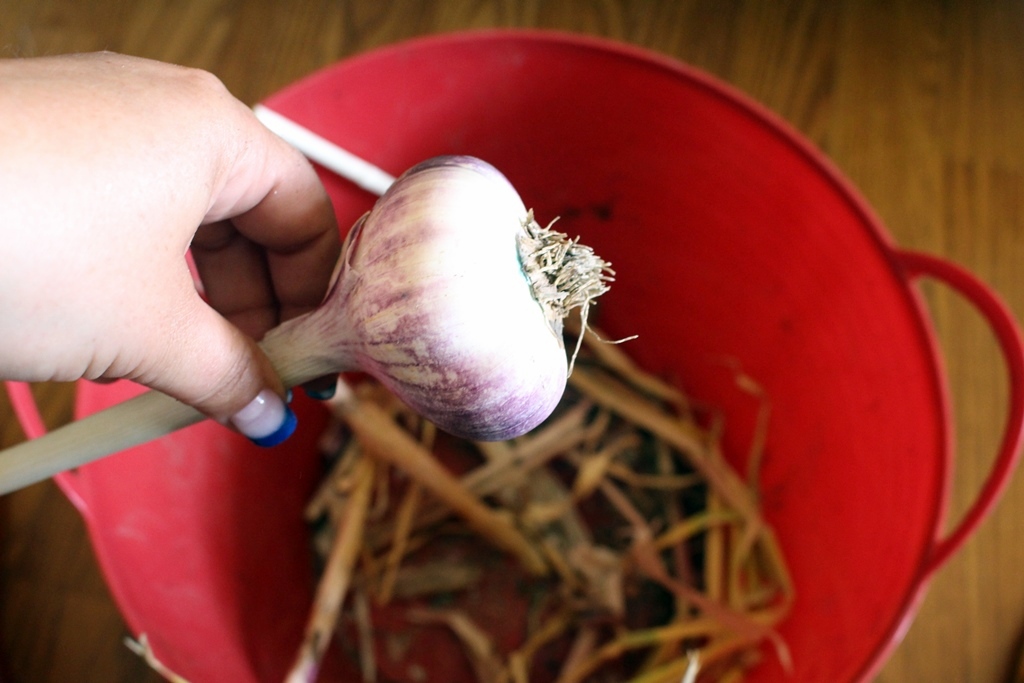
Dandelions  are particularly difficult due to their taproots. Taproots are big, easy to break, and don’t like coming out of the ground. The plant in the picture, probably has a tap root at least a foot long. So if you don’t get the entire root out, the plant will come back. I’m convinced it only needs a millimeter of root to go full blown butthead all over again. The one in the picture, he’s a lifer. I could make my entire existence about getting the entire root out, only to have a new one show up right next to it. There’s no point.

The best way to attack dandelions is to get them while they’re pretty small. First, take your spade and shove is straight down next to the plant. Then carefully loosen the soil around the taproot before pulling it out. IMG_9194

If you feel a snap when pulling, chances are you didn’t get the whole root. You’ll see blunt ends like this:

IMG_9197


Oh goody! I get to try again in a month or two…. kill me now!

If you are lucky enough to get the whole root, congratulations, you got rid of one dandelion. Break out the champagne!

IMG_9193

When it comes to weeds and weeding the best way to approach the situation is to set goals. If you spend an entire day weeding, you’ll burn yourself out and be extremely exasperated to discover they’ve all grown back in a week. What I do is this: Monday through Friday, in the evenings, when it’s cool, I take my tools and weed until I’ve filled up my little red bucket. It takes less than 10 minutes and keeps me on top of the problem. I feel like I’m selling you a work out program: Just 10 minutes of your day and your garden will look and stay amazing! In all honesty, I slip all the time, but I do the best I can. When it comes to weeds, the only way to live with them is to accept that they will always be there and you will always have to deal with them. So we must live humbly among a species that has proven far more successful than our own.


Roses are red, Violets are blue; But they don’t get around, Like the dandelions do.~ Slim Acres.

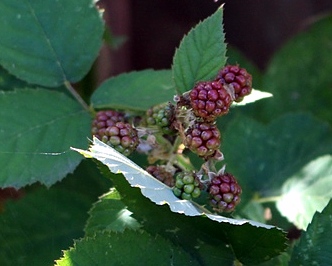
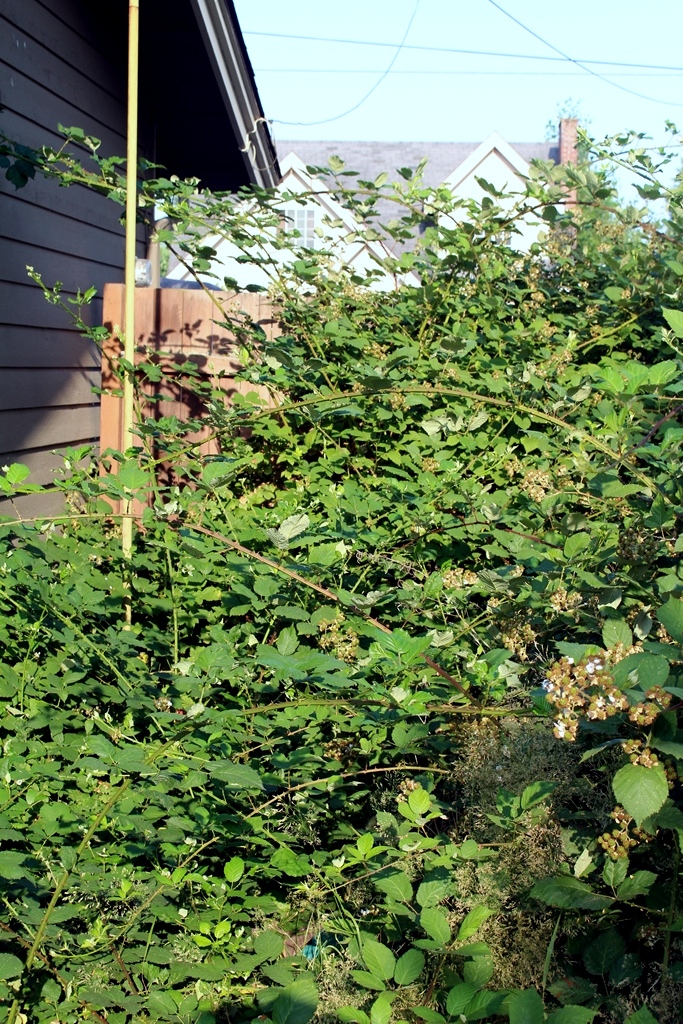
As for the silver lining? There is one weed that has thrived in a corner of the back of our house that we rarely visit…

IMG_9626

I swear it wasn’t even half that big last year! MM was about to go shred it when I screamed “STOP!!”

IMG_9629

Look at all those blackberries!! We are going to be up to our eyeballs in berry goodness in a few weeks!! So I guess it ain’t all bad…. I still hate ’em, but if they have berries, I’ll let it slide 🙂

How do you deal with your weeds?
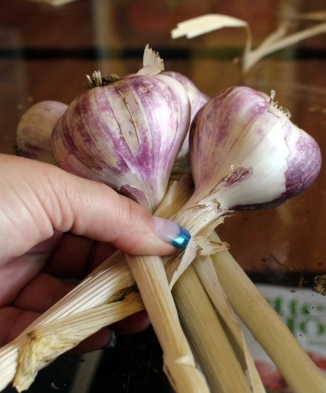
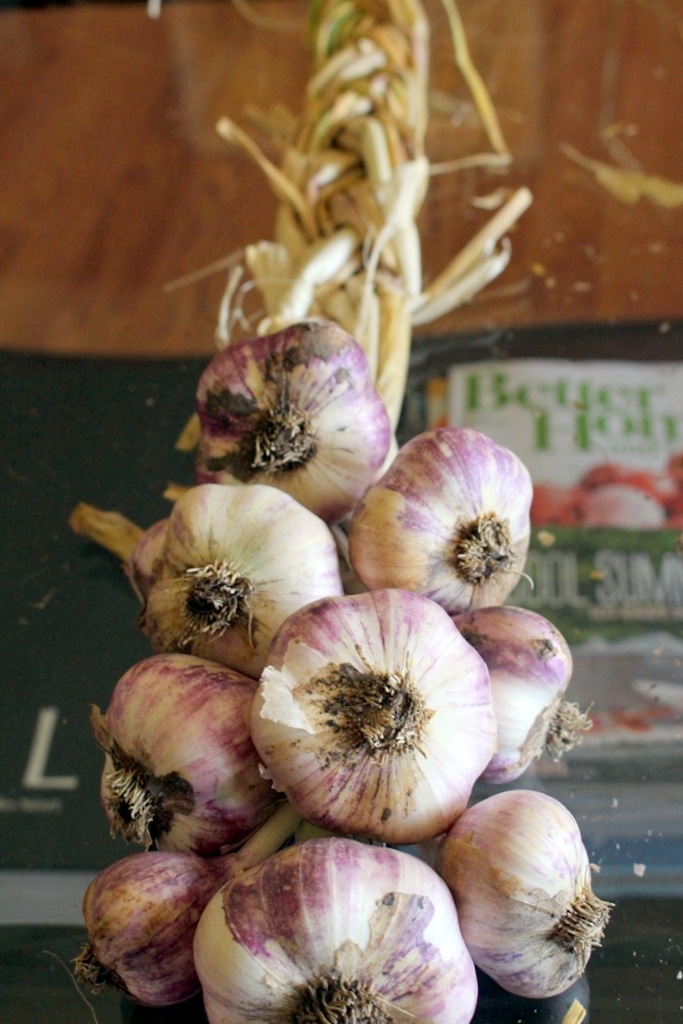


Meanwhile, Back in the Garden…. June 2015

Things are finally taking off! It’s been a bumpy start to be sure. I just couldn’t find a minute to tend my garden if my life depended on it! Ugh I hate being so busy that my personal priorities have to be put aside. All for good reasons, but still. I just missed my garden and couldn’t stop kicking myself for how far behind I was getting. With a little tenacity and burning the candle at both ends, results are beginning to show. Come check it out!

Flowers

Let’s start with the pretties.

IMG_8914

My first dahlia bloom….

IMG_8912

The rest are on the way 😀

IMG_8905

I finally got my lavender to come back and it’s doing great! Smells so good.

IMG_8902This is my new edition to the perennial plot. It’s called a gayflower. With a name like that you really can’t go wrong, lol. See MM’s silly chainsaw carved bear in the background? So silly.

IMG_8915

I’m super happy with the progress of my homemade hanging baskets.

IMG_8924And Grandma Bev’s annuals are exploding!

Edibles

Like I said, I’ve been too busy to complete all my veggie garden projects on time. So with little time for pruning, a few plants went wild… namely the catnip and oregano.

IMG_8894Yes, my friends, that is a wheel barrow full of catnip! I already have plenty so I’m giving this up to the compost gods. The oregano, on the other hand, is drying nicely and should be ready for the herbs and spices cupboard shortly.

IMG_8944The peas are finally coming in. Although I’m pretty sure it’s not going to be a bumper crop. I think the soil in that corner is a bit to saturated for anything to grow in the spring. Oh well, live and learn. The slug problem I had  a month ago has thankfully dissipated.

IMG_8948

The strawberries are doing really well. It amazes me how one plot of land can behave completely different from another. At my old house, I couldn’t get to the strawberries before the birds did, I only live about 15 miles away and don’t have that problem at all now….weird. Not that I’m complaining.

IMG_8951I feel like I’m finally dialed in on carrots. Thank you Mark from Mark’s Veg Plot for suggesting container carrots. I’ve never had such a good looking crop! Converted! Lettuce bed in the background. I keep thinning it and using the baby clippings in salads, yum!

IMG_8935

The elephant garlic is bolting so it should be ready to harvest within the month.

IMG_8938 IMG_8940

Another experiment of mine: hot peppers in hanging baskets vs. in the ground. We shall see which yields more fruit!

IMG_8965

Onions looking happy!

IMG_8898My tiny plot of corn just planted. I know it’s not much but I still love growing it.

IMG_9017

I’m really proud of my tomatoes. They are all doing great! It’s hard to tell the ones I bought from the store apart from the ones I grew from seed! Yay! Tomatoes Galore!

IMG_8954 The cucumbers are making their debut….along with the weeds ugh!

IMG_8995

Today marks the final big chore in the veggie plot: Setting up the soaker hoses (post coming soon!) Now everything is planted and automatically watered. So all I have to do is weed (ugh) and harvest!

IMG_8993

Happy Garden, Happy Me!

How is your garden growing? 


Meanwhile, Back at the Garden…. May 2015

Things are finally starting to happen! Sprouts, buds, flowers, shoots, all waking up!

IMG_8146

Spurge blossoms

IMG_8149

This is one of the four perennial starts I got at the Northwest Flower and Garden Show. All 4 have little leaves coming through, I can’t wait to see them bloom 🙂

IMG_8155

Most of the dahlias have poked through.

IMG_8171

My lettuce plot, I just threw a ton of seeds in there and we’ll see what happens. That’s kind of been my attitude about a lot of things in my garden this year. Apparently the weeds have the same idea. Sigh, the never ending gardeners battle.

IMG_8174

The carrots were also simply scattered in their respective buckets. I’m loving how they burst through the soil like tiny fissures in the ground erupting green goodness.
IMG_8252 IMG_8169

Cucumber on the left, zucchini on the right. So cute!

IMG_8176 IMG_8250

Now on the the challenges and learning portion of the post. First up, peas… WTF!?!? Peas are the easiest thing to plant! I have never ever ever had a problem with growing peas until now. First, I purchased garden twine, which apparently is very soft and after a few rains, snapped and fell apart. Totally annoyed. What is the point of twine that doesn’t stay? I don’t get it. Second, the plants were getting munched on! At first I thought maybe it was bugs but then I found slime trails. Slugs? I’ve never had a problem with slugs going after my peas. Squash, sure, but never peas!

IMG_8245

Ah, much better. Sisal twine and a healthy dose of slug bait. Now can we have some growth please? K thanks!

IMG_8166

Drat,  my impatience always bites me in the butt! This is one of my very sad tomato plants. I put them out too early and the cold mornings killed off most of their lower leaves. I was about to call the whole thing a wash when MM’s mom came to visit and coaxed me into saving them. The tops are healthy and you can see there are little sprouts coming in where the lower leaves died off. Still I’m not putting all my eggs in one basket, no sir! I’m curious how well they will produce but I’m not confident in their yeild.

IMG_8180

So I got rid of two that were beyond repair and purchased 3 very healthy looking plants from Freddy’s. Mr. Stripey… I had to, the name made me giggle. Now I have 6 plants, half mine, half people who know what they’re doing lol. Either way, there will be tomatoes, oh yes, there will be many tomatoes!

IMG_8183

My annuals are doing fantastic. I can’t wait to put them out front in my homage to Grandma Bev. Still waiting on the daffodil foliage to die out but a few of the pots and hanging baskets have made their way out front. For more information on annual flowers, check out this post:

Fun with Annual Flowers

IMG_8199

Every once in a while Home Depot will surprise me with a unique plant that I just have to have. Meet Lewisa. She is so pretty! The flowers come in tones of pink and orange amidst long slightly succulent leaves. I love it! Now to see how it behaves over time.

IMG_8209

I’ve also recently replenished my succulent bowl. See the rock smiling at your? That would be Mountain Man’s contribution to the garden art.

IMG_8243

My first bearded iris bloom of the year. This thing is HUGE! Bigger than a soft ball. I can’t wait till it’s friends pop open. Maybe a week or two?

IMG_8220

How are things going in your garden?

Veggie Plotting: Phase 2

Finally! After several very soggy weeks the sun came out and decided to stay for a while. I knew the minute I saw all suns across the weekly view on my weather app that it was time to get back to planting. I was borderline giddy when I woke up this weekend to the celestial morning light coming through the blinds. I hardly made it through my typical couch/coffee/Kelly and Michael weekend ritual before I was getting dressed and heading out the door to get a few provisions for the day. Upon returning, the game was afoot!

Carrots

I have had the worst time trying to get decent carrots to grow. The ground soil is very nutrient rich but also loamy and tends to compact too tightly for the little guys to really get deep and big. I usually only end up with about 10 out of 100 that are actually passable. Enter Mark’s Veg Plot, a fellow blogger I thoroughly enjoy following. In one of his recent posts, We Have Lift-Off he mentioned that he grows his carrots in rubbermade totes! So smart! I can use potting soil and have a mini portable raised bed!

IMG_7730

Sooooo, I purchased a couple long, deep, and cheap flower planters. I made a 50/50 mix of compost and potting soil, scattered the seeds, sprinkled soil over them, and watered. I hope this works!

As silly as it sounds, I don’t really like carrots…. but MM does so I grow them for him. I would love to be able to pack carrots in his lunch for several weeks rather than days this season.

CucumbersIMG_7737

Since I’ve decided not to deal with sugar pumpkins this year that means I get to dedicate my entire A frame trellis to cucumbers! One side will be slicers, the other will be pickling. I can’t wait for pickles! They’re like natures potato chip and I can’t stop eating them! Again the issue of soil easily compacting comes into play. So I start them off in a long mound of potting soil and compost. Once they hit the loamy stuff, they’ll be well established and loving life.


Tomatoes

Oh tomato, you tricky little minx. As you can see below they have out grown my windowsill lighting system. They are also fairly leggy. I’m ok with that. For a first half-assed attempt I think I did pretty good. After discussing with several gardening friends, I’ve decided that next year I will get real grow lights and keep a lot less space between the light and the plant.

IMG_7721

Still they are viable. For the cherry tomatoes. which I hang in wooden baskets, my initial thought was to lay them diagonally so the lower stems would get buried and creat a better root system…..

IMG_7741

But I forgot about wind and gravity. The slightest breeze and the fragile stems bent and snapped. Sigh. Physics rears its ugly head again!

IMG_7755

However the golden nuggets apparently got the memo on what they were supposed to do so it’s not a total loss.

IMG_7758

I guess I’ll just go to the store and get some proper starts…wait! Are those strawberries? Better get some of those too! I can never just get the one thing I’m supposed to get as a nursery. Although with a ring in at $7 this was probably the least expensive gardening trip ever!!

IMG_7769

As for the big tomatoes, they are just great!! The early girls and beefmasters are adjusting well to their new outdoor digs. I burried them about a foot down. See all those little white hairs? Each one has potential to be a new root to assist feeding the plant. The more roots, the more tomatoes!

IMG_7745

I got new colorful tomato cages. I just had to, they were so cute! Notice I put them in the ground pointy side down this time? I’m such a dunderhead! I assumed since they were sold pointy side up that you set them in the ground pointy side up. I couldn’t figure out for the life of me why the cages weren’t very effective…. #facepalm.

IMG_7749

Zucchini

Last but not least, the zucchini. Again, using a 50/50 mix of compost and potting soil, I made a few mounds about a foot or two apart. I figured 5 would be a conservative start since I always end up with way more than I actually need.

FullSizeRender

After mulching, it was time for a victory beer!

In related news:

The garlic is, well, perfect!!

IMG_7785

The peas are about to begin their viney ascension up the tee-pee trellises.

IMG_7764

The oregano and cat nip I planted last year came back with a vengeance!

IMG_7760    IMG_7761

My pretty annuals are getting comfortable in their new homes. I’m looking forward to putting them out front on display once the daffodil leaves die off.

IMG_7774

How are things going in your garden?

What are you planting these days?

Annual Flowers for Spring and Summer. Ideas for you flower pots and beds this season. Small Town Girl Blog.

Fun with Annual Flowers

I had plans for the vegetable garden today…. the weather however, had different ones. In typical Northwest fashion the day seems to toggle between sun bursts and black clouds filled with rain and hail. I really, really wanted to plant my cucumbers, carrots, zucchini, and perhaps some herbs today but after standing around staring at the saturated ground, I couldn’t bring myself to plant anything.

IMG_7591

With my plans for the morning dashed into hopelessness, I needed to find a way to salvage my itchy green thumb. So I decided to get the annuals together for Grandma Bev’s garden. Grandma Bev was MM’s sweet, lovely grandmother who we lost to a stroke a little over a year ago. After passing she, as so many of our grandmothers do, had a great deal of odds and ends that needed good homes. These included some adorable flower pots and garden art. Pinks and pastels are typically not what I go for in my choice of flowers, but it’s definitely what Bev loved. So for one corner of my gardening world, it is dedicated to her.

I wanted to expand and add to Grandma Bev’s nook in the front of our house during the summer so yesterday I decided to add a few more pots or things that could double as pots to the mix. I went to my nearby vintage store, the Queen’s Ransom, in search of treasure and came home with these:

IMG_7580

Isn’t the wheel barrow the cutest!?! I got it for $7! Score!!IMG_7583

These were each $2, again score!! I’m totally going back! Really cool stuff!

IMG_7585

They also had these simple wooden crates for cheap. I’ve always wanted to do something with one of these, why not a planter? I decided to paint it in pastels to work with Bev’s style. It looks pretty 80’s if you ask me but once I put flowers in it, I’m kinda really loving it!

Annual Flowers for Spring  and Summer. Ideas for you flower pots and beds this season. Small Town Girl Blog.

I think I might go buy another one it makes me smile so much….

Today I wandered off to Freddy’s to see what they had in the reawakened outdoor gardening section. In typical me fashion, I got a little of everything and probably more than I should have…. When I looked down and saw I filled the cart I figured it was time to stop and run home before I did any more damage to my financial statis. I am a terror at spending when it comes to plants. All bets are off!

The cool thing about choosing flowers for Grandma Bev is that it’s a lot less limiting than my picky and particular tastes. I soon realized I had picked up just about every classic annual out there. Then I thought to myself, this might be a nice post idea to share some of my thoughts on annual flowers and why I plant them. So here we go!

Why plant annuals?

  1. They’re friking beautiful! Duh! You can’t beat the color and variety of annuals.
  2. They have lots of flowers and can flower for most of the spring and summer. So you can pretty much have a rainbow of bright beautiful blooms during the warmer part of the year.
  3. Great plants for beginner gardeners. They’re kind of like the next level up from house plants in my opinion. If you can grow houseplants, try annuals. If you can do that well, maybe it’s time to challenge yourself with vegetables and such.
  4. They like it simple: typically flowering annuals want part sun, grow great straight in the ground or in potting soil, don’t need to be fertilized very often. It doesn’t hurt to fertlize though. I usually do once a week.
  5. They’ll let you know when they need help. Annuals are pretty fragile plants so when they’re thirsty, hungry, need more light, etc. They’ll tell you in the form of drooping. This is a really nice feature for those of us that can be a little forgetful particularly when it comes to watering.
  6. Got kids? Planting annuals is a fantastic way to teach your children about plants and plant care. That’s how I learned. My mom, sister, and I would plant primroses, geraniums, and marigolds all over the house.
  7. When they’re done, you’re done. Since they don’t come back, after the frost, just let them die off. You don’t have to do anything else!

My favorite annuals:

Marigolds

Marigolds hold a special place in my heart. This was gardening 101 when I was little. Mom taught me how to properly plant flowers using marigolds. We would plant them all along the front walk way to our house. They come in vibrant hues of red, orange, and yellow. They will keep on flowering until the first frosts. Be careful though, the slugs LOVE these so make sure you are using slug bait if they’re close to the ground.

Annual Flowers for Spring  and Summer. Ideas for you flower pots and beds this season. Small Town Girl Blog.

Mini Dahlias

Well of course I’d pick these, I’m addicted to dahlias. I love everything about them. In mini version, well that’s just fantastic!

Annual Flowers for Spring  and Summer. Ideas for you flower pots and beds this season. Small Town Girl Blog.

Celosia

The fuzzy flower. These are so weird and pretty. They come in spikes and crests generally in hues variying from deep red to sunshine yellow. Not only do you get a variety in the color of blooms but also in the leaves!

Annual Flowers for Spring  and Summer. Ideas for you flower pots and beds this season. Small Town Girl Blog.

Aster

Daisy like flowers in tones of purple that are more on the blue side than the red. I love the vibrance of these beauties. They also come in perennial varieties.

Annual Flowers for Spring  and Summer. Ideas for you flower pots and beds this season. Small Town Girl Blog.

Dianthus

Pinks, red, whites, and combos of these colors all on a single plant! Their round little flowers remind me of coins for some reason… I don’t know, I’m weird.

Annual Flowers for Spring  and Summer. Ideas for you flower pots and beds this season. Small Town Girl Blog.

Cosmos

Tall lanky and frail, yet we love them. It might be the name. It might be the weird goofy leaves, Probably it’s the pale perfection of their fragile petals. Sigh.

Annual Flowers for Spring  and Summer. Ideas for you flower pots and beds this season. Small Town Girl Blog.

Creeping Jenny

My new favorite trailer! They look like a string of green pearls! So pretty! A great complimentary splash of green to go with all these colorful flowers.

Annual Flowers for Spring  and Summer. Ideas for you flower pots and beds this season. Small Town Girl Blog.

Geraniums

Tall, strong, proud. Little poofs of pink, red, or white flowers at the top. This one is a classic! Sorry, only greery for these little guys. I bought the babies, they were so cheap!

IMG_7653

Pansies

The colors these flowers produce can be soft and subtle or bold and bright and everything in between. I decided to get one of each!

IMG_7659 IMG_7664

Lobelia

A great filler for everything! I use them in my beds, pots, and hanging baskets. Some are trailing, some are mounding. Generally colors range from white to deep purply blue. These dainty little flowers can do amazing things to the dynamic of your flower scheme.

Annual Flowers for Spring  and Summer. Ideas for you flower pots and beds this season. Small Town Girl Blog.

Alyssum

Another filler with teeny tiny flowers in white or purple. Perfect for any corner that needs a little something.

Annual Flowers for Spring  and Summer. Ideas for you flower pots and beds this season. Small Town Girl Blog.

As you can see, I bought a ton of flowers today. I think I went a bit over board but I’m happy with the results:

Annual Flowers for Spring  and Summer. Ideas for you flower pots and beds this season. Small Town Girl Blog. Annual Flowers for Spring  and Summer. Ideas for you flower pots and beds this season. Small Town Girl Blog. Annual Flowers for Spring  and Summer. Ideas for you flower pots and beds this season. Small Town Girl Blog. Annual Flowers for Spring  and Summer. Ideas for you flower pots and beds this season. Small Town Girl Blog. Annual Flowers for Spring  and Summer. Ideas for you flower pots and beds this season. Small Town Girl Blog.

Of course, I still have a bunch left over! Looks like I’m going to have to get more pots!

Annual Flowers for Spring  and Summer. Ideas for you flower pots and beds this season. Small Town Girl Blog.

What are your favorite annual flowers? 

Basket Case

For a fantastic tutorial on how to make your own Hanging Flower Baskets for Spring and Summer, follow the link below:

DIY Hanging Flower Baskets

Spring fever has hit me! I woke up and all I wanted to do was play with flowers. There were other things, of course, I should be doing,\: cleaning house, laundry, planting vegetables, etc. But flowers! I want flowers! “Want” always beats out “should” in every competition, which is how I found myself at my favorite local garden center.
mclendons

I knew what I wanted to get accomplished: A mother’s day hanging basket for my mom and MM’s mom, and 3 for me. So in my head I figured on about 25-30 plants and some coco basket refills. Usually I come with a bit more focused plan that includes a written list of about how many verbenas, calibrachoas, fuscias, etc. I don’t know what came over me today, but i just started grabbing what looked pretty from the “basket stuffers” aisle. A little of this, a little of that, no theme colors, just whatever was withing reach. In about 10 minutes, my cart looked like this:

flowers

It may be time to head home…. Since the backyard is under construction, I decided to get the foldy table out and work in the sunny front yard.

IMG_7076

Step 1 organize! I like to put them together by breed and how they grow: trailing, clumping, or upright.

IMG_7080

Now what goes in which basket?? Again, I was feeling very random today so I just grabbed a basket and started putting stuff in it. Red, purple, yellow, orange, white, it didn’t matter to me today! I was just happy for flowers! Sometime the most random combinations can be the most beautiful… or so I hope.

IMG_7087

My big basket always gets an array of calibrachoa (million bells). I bought too many to put in the top so I cut holes in the sides and stuffed them there too! I’ve seen posts on Pinterest for this but I’ve never tried it. Yay experiments!

IMG_7083

I always like to mix the potting soil with some quality locally made compost.

IMG_7086

The one part I did slow down for was placement. That is important. For more on this, picking the right flowers, and care, check out this link:

DIY Hanging Flower Baskets

For now, they will have a nice home on the ground in the unused part of the veggie garden where they can get a ton of sun and rain before they are moved to their permanent partially shaded and covered home under our front oning.

IMG_7098

Anyone else playing with flowers yet? 

How do you cool down your Spring fever?

Gettin After It!!

Do you ever get sick for a week and then wake up one day refreshed and ready to rumble? That was today for Mountain Man and I. Damn, we were productive! It was great! We have been fighting the head cold from hell all week. Coming home each night and faceplanting into the bed well before 8pm only to whimper and whine all the way to work the next morning. I finally gave in and took Friday off and am thankful for it. I could barely get off the couch!

IMG_0972To boot, I had tickets for Mamma Mia on Saturday. I had to go! Those tickets were expensive and I got them in November! Sniffles and all I scurried out to the big bad city to meet up with my girls. It was awesome! I loved every minute of it! After the show we enjoyed a lovely dinner at Ristorante Machiavelli. It’s the ultimate in tiny hole-in-the-wall Italian eateries with a line out the door before they  even open. It’s that good! I was sad to part after dinner but knew I needed to go home and rest rather than gallivant around the city with my girls. God, I so wanted to gallivant! But home I went and was very happy to see my man, dog, cat, and bed.

IMG_6972Sunday began with MM and I wide awake before the sun was even up! Apparently after a week of doing nothing, our bodies were ready to work. So we got after it!

After breakfast and coffee, I got inspired to plant my dahlias. It’s a little early but the winter was practically non existent and spring has been remarkably warm, so why not? Meanwhile MM thached the front yard. Still in disbelief of how good I felt, I put on my boots and tromped out into our muddy back yard. I thought, for sure, I’d get maybe 2 plants in the ground, get dizzy, and give up…IMG_6973Nope, next thing I knew, they were all planted and I was ready for more!

IMG_6977

MM and I headed to Home Depot for supplies for our (his) next project, fixing the mud pit of a back yard. Without a word or a request to help, he set up the fence, laid out fresh top soil, reseeded, and watered. Stella is less than thrilled.

IMG_6981

I was not about to stand Idly by, so I picked away at the veggie garden maintenance. At first I was innocently mulching around the peas and onions….And I ran out of mulch! So I figured I’d give the old rototiller a try. Go figure, it decided to run like it was brand new!! So I happily tilled and weeded the area for squash and carrots.

IMG_6983   IMG_6982

I was so jazzed to find it was only 2:30! Victory beer!!

IMG_0971

After an hour of enjoying our handiwork, I came in and made this work of art for dinner! It was epic! Swedish Meatballs with a little twist… recipe coming soon.

IMG_7056

I love Sundays like this! Not a second wasted and spending it at home with my little family in our small town 🙂

How was your Sunday? 

Are you doing any spring gardening or matinence?

My How You’ve Grown!

Yes, my friends, these are my tomatoes from seed. Can you feel me glowing with pride from behind the screen?? How did I get them to grow so healthy? Honestly I don’t know, lol. I used plain old incandescent lights, cheap potting soil, and no fertilizer! Sometimes, less is more I suppose. I’m just over the moon at how successful they’ve been so far. Please please please keep going, little guys! If I can take this all the way to fruit then I might feel confident in claiming I have a green thumb. I truly feel like this is my gardener’s right of passage.

If you would like to read the previous posts, here are the links:

Part 1     Part 2    Part 3

IMG_6751

So Sunday I found a little time to re-pot my babies since they had certainly outgrown their peat pots…. I always wondered why I had a compulsion to save all these silly plastic pots, now I know!

IMG_6718

When I pulled most of them out of the bin they were sitting in, I found that the roots had begun to blow out the bottom.

IMG_6719

I love peat pots for stuff like this, they are so easy to cut and peel without hurting the seedlings.

IMG_6723

Yay root ball!

IMG_6726

Have you ever seen these velcro ties? Best thing ever!! Just cut off what you need and snap the ends together. These are super useful with the dahlias since they tend to get bigger and bigger as the summer rolls on. I cut an extra large piece and then adjust they expand. Cool right?

IMG_6722

Here we are in our new home complete with support ties and label. Doesn’t Mr. Beefmaster look happy?

IMG_6730

Of course nothing goes to waste. Everything in the compost bin!

IMG_6732

Now back up to the sunny ledge with you! I’m thinking they’ll be ready to go in the garden in the beginning of May.

IMG_6748In related news, the onions I’ve grown from seed are doing well. They’re not quite ready to be put with their brethren starts in the ground but I’m optimistic they will be our last round of ripe onions before the fall freeze.

IMG_6771I also found my paperbush! I’m super excited about this. They were all over the Northwest Flower and Garden Show and I’ve been on the prowl for one ever since. After a few discouraging inquiries at a few local nurseries, I tracked it down at the Portland Nursery while visiting Caliente.

IMG_6711

The herbs I planted at the time of the tomatoes have certainly been interesting. They seem to sit atop my kitchen sill, smirk, and say, “Whateva! I grow how I want!” Sigh, very well. Do your thang. I bet they’ll improve with the increase in sun.

 IMG_6776      IMG_6779 IMG_6782 IMG_6789

How are things going in your garden? 

What seeds have you started indoors?